
When we tell people we are liveaboards for the winter in Boston we get a lot of the same questions: how do you heat the boat; isn’t it going to be cold; do you have to shovel; how do you get fresh water; how do you pump out waste; do you shrink wrap the boat?
Of course we had all of these same questions. As I typically do, I spent many hours doing internet research, talking to those who have been doing it and planning out how I would do it. This will be the first in a series of posts to answer these winter liveaboard questions.
So let’s talk shrink wrap.
When we still had our house, Smitty would spend the winters on the hard. She came with a decent canvas cover from the previous owner that we would use to keep the snow off her decks and thereby reduce the condensation inside the boat. We would pull most of the stuff off the boat and position the mattress and cushions so they had air movement around them to reduce the mildew build up. Winterize the engine, freshwater system and waste system with antifreeze. Then in the spring we would have a big cleaning to get rid of the mildew, put the boat back together and get ready for launch with bottom paint and wax.

Smitty all bundled up for her last winter on the hard last December
This method wouldn’t work for this year with us living aboard. First, most marinas won’t let you live on the boat in the boatyard. There is no way to deal with waste plus it becomes an insurance issue.
Living aboard with the boat in the water is really the only real way. Our friends, Tom and Nancy from Tidal Life, had spent a winter in the Boston area at Captain’s Cove Marina in Quincy. They didn’t cover their boat and would just clear the snow off of the deck. This did lead to a lot of condensation and we knew this would not be something we wanted to deal with. We could use the canvas cover but my search suggested a better alternative: clear shrink wrap.
Using clear shrink wrap let’s you create a greenhouse effect during the sunny days. This can reduce the heating cost for the winter months and expand the usable space by making the cockpit someplace you can spend time when it’s warm enough. But how do you build the frame and from what materials?
Wood or tubing? It seems there are 3 main choices: wood, PVC tubing or metal tubing. The metal tubing is the most appealing to me if we were doing this long term. You spend the time once, bending electrical conduit to the correct angles and putting fittings in where needed. Then you just have to put up the structure the following years.
You could do the same for wood and it would be less expensive. But eventually the wood would rot and you would have to replace it. Not a big deal because you would be using relatively inexpensive materials. With both of these methods you would create a sloped roof where having a enough pitch is key to the structure surviving heavy snow build up. You also need to make sure you are not putting stress on your stanchions. This could create an entry point for water and lead to deck rot. Maine Sail did a good write up of this style on the Sailboat Owner’s Forum.
The PVC tubing option is another variation. With this option you use PVC electrical conduit (more flexible than PVC plumbing pipe) to make arches to support the shrink wrap. You would still need some kind of central beam for support. Typically that would be made from wood or be the boom or a combination of both. Under this construction, the arches create the lift and keep the stress off of the stanchions. Tim and Kathy, liveaboard boaters from Maine now on their way south for an extended cruise, have a good description of this method on their blog. Tim also discuss being a winter liveaboard in the video below.
When we got over to Constitution Marina one of the first things I did was walk around and check out what other people had done. There were examples of all of the methods above. Every boat has some unique difference that require variations in the way you construct the support system for the wrap. But there were a lot of good ideas to borrow from the other boaters.
We had decided to go with the PVC arch method. After some discussions with our new friend, Andrew who has been living aboard his Catalina 310 in Boston for 13 years, we made some modifications. Andrew introduced the concept of windage to the structures. His opinion was that you want to keep the overall structure low to the boat, thus reducing windage. This was a great piece of info to consider. He also made some recommendations on how we attach the arches to the boat and how many we needed.
The first thing we did was construct the doorway and central support beam. As typical, we are sterned in at the dock. We like to use the walk through transom to access the boat. The mast is also still up and the boom is on. So we constructed a door in the transom walk-through that tied into the boom. The doorway was made out of 2×3 with 1×3 used to create cross bracing. The bracing was tied to the stern rail with zip ties. A lot of them. Probably too many but they are cheap and I didn’t want to see a lot of movement in the frame.
We removed the topping lift from the boom. With the rigid boom vang would would probably have just left it as is but decided it would be best to support the end of the boom. We put a 2×3 under the boom at the help station. Pipe strap was used to keep the 2×3 directly under the boom and I wrapped a microfiber rag around the boom so the strap wouldn’t mark the boom. For the section from the mast forward, we used 1×3 on end so the 1-inch side was facing up. The boards we had were only 8 feet long and we had to use two to get from the boom to the bow. I reinforced the joint with additional boards on each side then screwed the whole thing together from both sides. It was pretty strong. I put one support in that section holding the board up with another piece of 1×3 at the joint. It could hold my weight without moving.
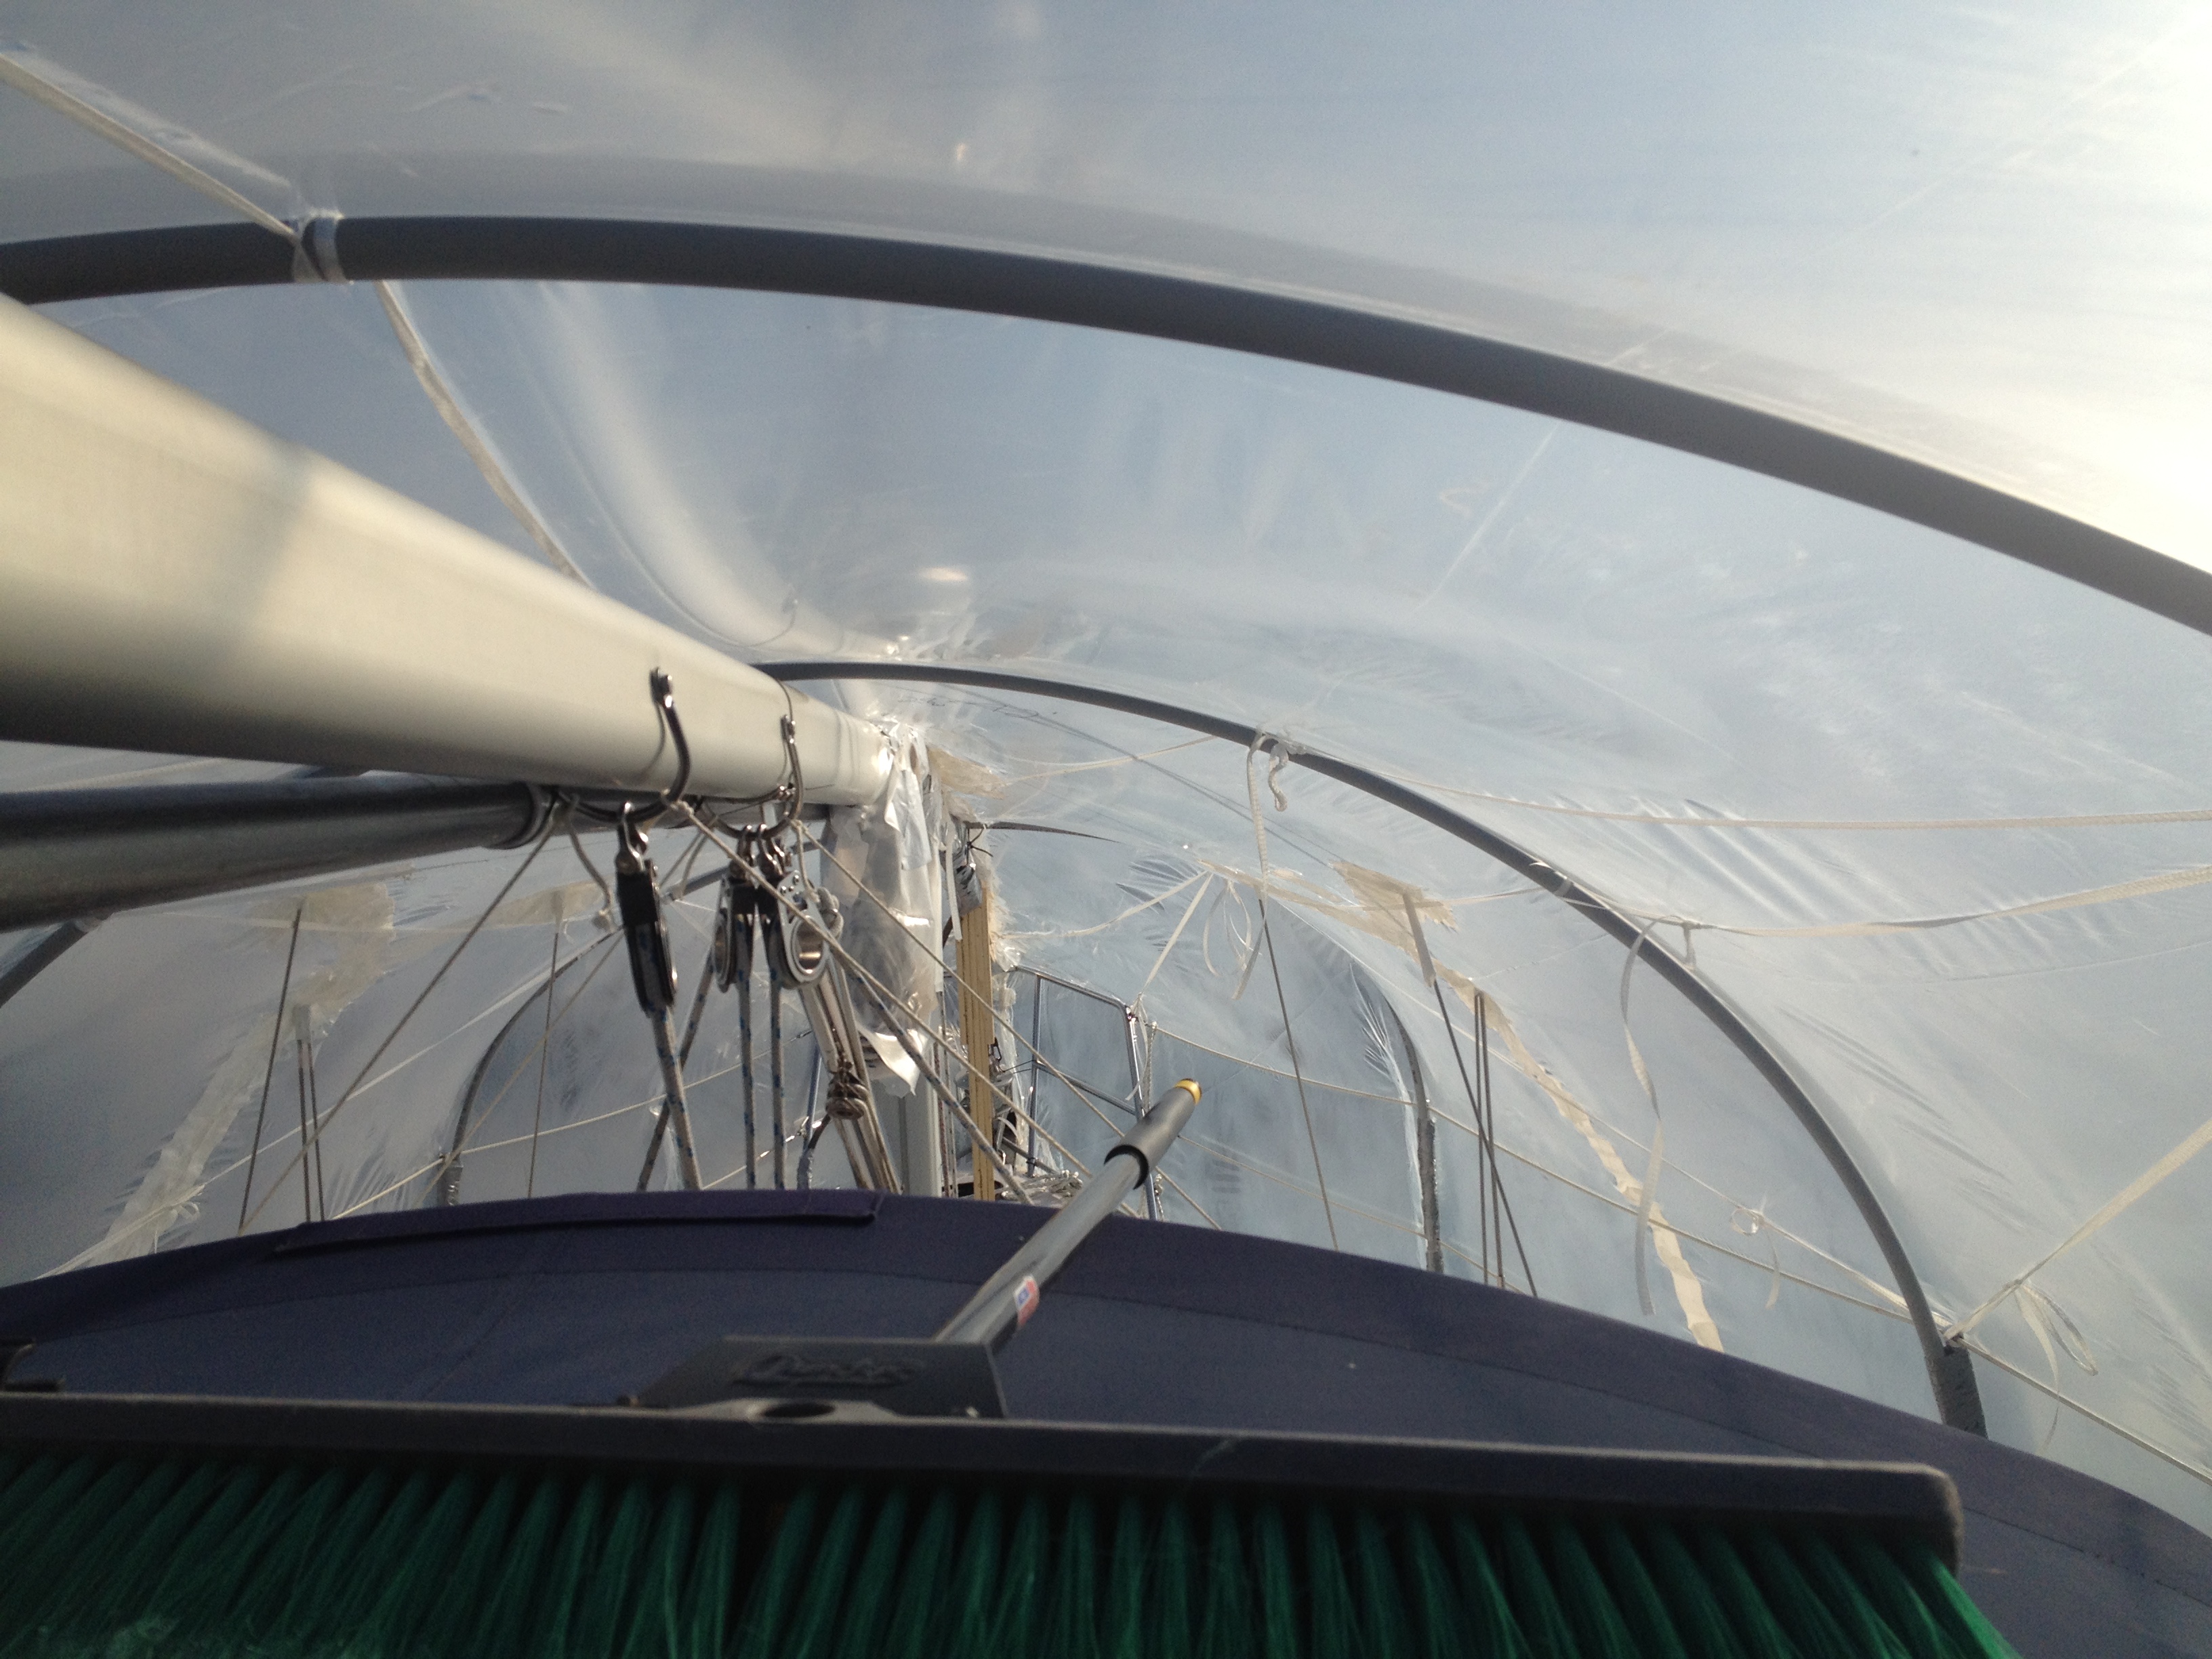
We ended up going with three arches plus the bimini tubing making a fourth arch. For the most forward arch we used 1/2-inch diameter PVC electrical conduit. For the other two arches we used 3/4-inch PVC electrical conduit. The reason for the smaller diameter for the forward arch is that the radius is a little smaller and it would take more pressure to bend that arch. I think that would put too much stress on the stanchions. Each arch started from two, ten-foot sections dry-fit together. One side of the arch was attached on the inside of the stanchion with zip ties, a lot of them again. We then bent the arch over to the stanchion on the opposite side of the boat and cut them to length. An approximately two-inch gap was left at the top of the arch so that there was room for the arches to compress with the shrink wrap. The other side of the arch was held to stanchion with zip ties again. To strengthen this support, the stanchion and arch were further held together with two layers of duct tape. The first layer was put on with the sticky side facing out so that it would be easier to remove in the spring.
The next stage was to shrink wrap. Since we had a power boat close to us on our starboard side we decided it was best to let the experienced shrink wrappers at the marine handle this stage. They rolled out the wrap and cut it to fit around the mast and rigging. Then propane torches were used to heat and shrink the wrap.
All that was left was to make a door. I used 1×3 wood strapping and shrink wrap to make a door. My Bride then decorated it with some Christmas lights.


We already had a couple of colder days where it was warm under the shrink wrap. The other day it was about 30 degrees outside but over 60 degrees under our bubble.
Up next, heaters, dehumidifier and temporary electrical panel.

December 3, 2014 at 9:05 pm
A job very well done! Lookin’ sweet. Can’t wait for the following posts
December 5, 2014 at 4:07 pm
Looks cozy. I imagine that sunshine makes a huge difference, and that the insulating air-barrier on deck helps a lot to keep warm at night.
One year I constructed an arch-type structure from pvc tubing also, but found that the weight of snow collapsed the tubing – not every where, but in a couple of places. However, I did not have a fair and rigid shrink-wrap cover over the tubing, so water, ice, and snow was able to accumulate at the bottoms of the tarp on deck – may well have been the reason for my collapsed tubing.
December 10, 2014 at 4:46 pm
This looks great! It surprisingly doesn’t snow much in Astoria, Oregon. We’re on the Columbia River and only about 20 miles from the Pacific so it’s rainy with occasional hail and frost during the winter so no one shrink wraps here. I think if we tried this the cat would probably scratch holes in it since even though he doesn’t leave the boat, he likes to be able to see the marina when he’s on deck. 😛